
As with a conventional oven, over time a Big Green Egg gets gunked up with fat, grease and other undesirable detritus. When the ceramics glisten with black, fatty deposits and there’s an aroma of fat as the Egg warms up, it’s time for a clean.
Not with Mr. Muscle though. I restored the Egg by performing a controlled clean burn. The result was an Egg nearly back to the state it was when purchased.
Welcome! Thanks for stopping by! Down below you’ll find out how to clean a Big Green Egg or other ceramic cooker. There’s plenty more great info in the blog, feel free to browse around whilst you’re here. The most popular technique and recipe posts are:
- Cooking pizza – tips and tricks
- Maxing out the Minimax / two level cooking
- Smoke your own cheese at home
- Over the top smoked chili … the blog’s most popular recipe
- Reverse seared steaks
- Umami smash burgers
If you’d like to stay up to date with new blog posts, just click the Follow button on the right (or down the bottom for mobile device users). Now, on with cleaning the Big Green Egg …
WARNING: DO NOT under any circumstances do this with a brand new Egg. I’ve seen posts on forums and other social media by people that have done a clean burn on a brand new Egg to clean factory detritus from it. There won’t be any, and a clean burn will almost certainly damage a new Egg. Only do this when your Egg is well used and gunked up.
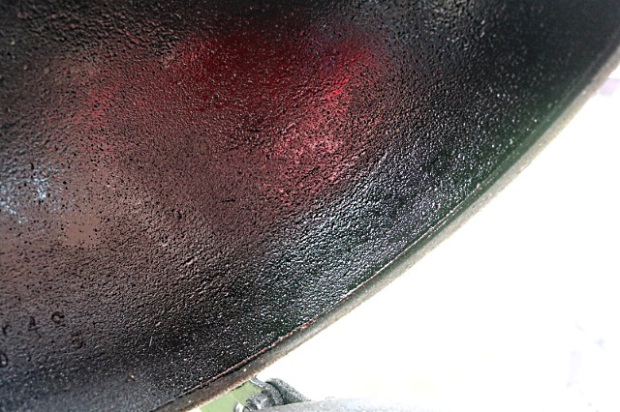
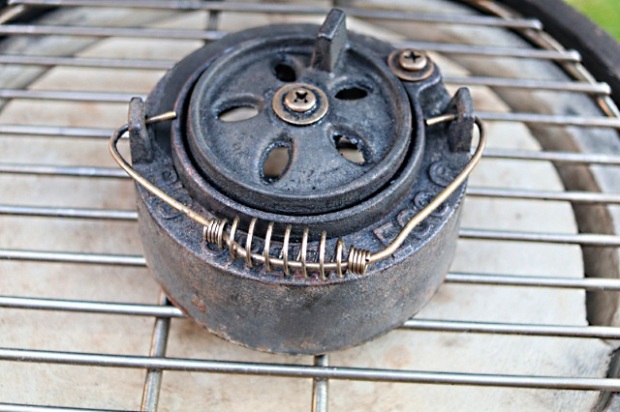
The pictures below show the fire ring and dome of the Egg coated with fat and grease after being used for a few months:
![]()
Performing a clean burn is easy.
- Fill the Egg up with mostly fresh charcoal nearly to the top of the fire ring. Light it.
- When the lump has caught, put in the platesetter, stainless steel grid and anything else you want cleaned. This includes the daisy wheel, if that needs cleaning.
- Close the lid, open up the bottom vent and let the lump burn down. Ensure that the Egg’s temperature does not go above 400°C/750°F (see below). Any temperature above 300°C/575°F is fine it’ll just take a bit longer if there’s thick deposits to remove.
- Leave it to cool.
Using standard Big Green Egg lump it took about two and a half hours to burn down completely. It then took about 4 hours to cool completely.
To protect the gasket as much as possible, I regulated the heat with the bottom vent so that it didn’t go above 400°C/750°F. I strongly recommend that you do this.
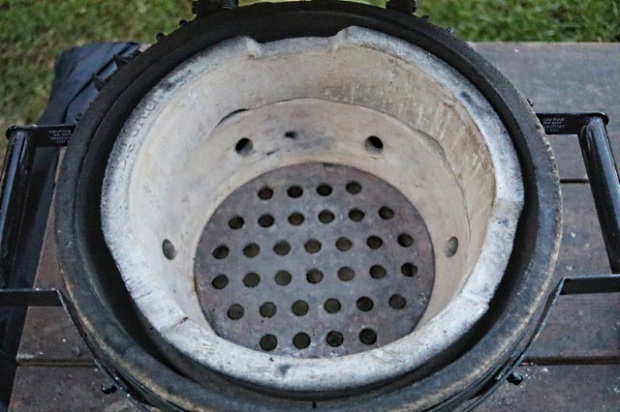
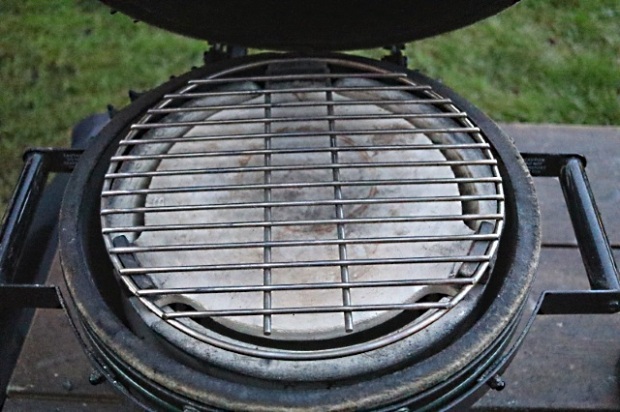
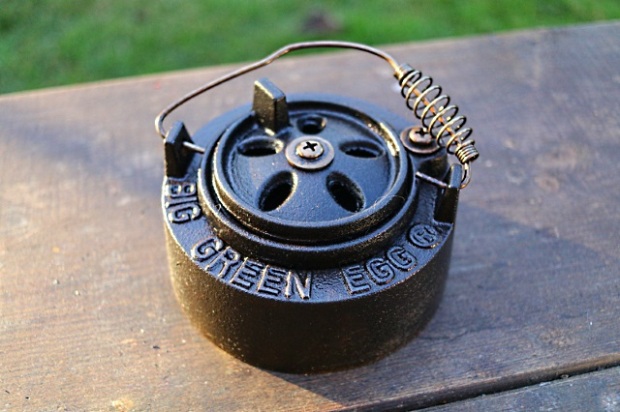
These pictures are after the clean burn completed and ash removed, nearly as good as new:
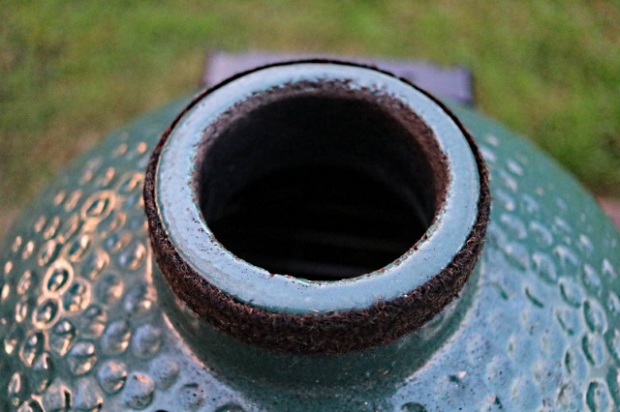
The hole at the top needed wiping down with some moist kitchen towel to remove the final bits of gunk after the Egg had cooled down.
The inside of the dome had small flakes of detritus left, I used a scraping stone to dislodge all of this into the ash.
The daisy wheel was clean and could actually move freely again. However it had lost it’s protective coating and showed some rust.
I rubbed it down with the wire brush, lightly coated with cooking oil and did a cook of chicken thighs at 160°C. Then I put the daisy wheel inside the Egg as it cooled down.
The result was that the next time I used the Minimax, there was no smoke coming out of the daisy wheel after the lump had caught. And no smell of burning fat.
Back to a clean cooking environment.
Keeping the Daisy Wheel Clean
The pictures above show the daisy wheel after it was cleansed of fat and other stuff that was causing it to stick until warmed up. However, this shouldn’t be necessary if the daisy wheel is placed inside the Egg as it cools after each cook. I was storing mine under the table, where it instantly cooled and become clogged up with grease. By placing it inside the Egg during cooling, the grease has a chance to burn off.
Cooking Pizza and Clean Burns
If you cook pizza in your Big Green Egg, this probably isn’t a problem. I cook pizza at 400°C in our large Egg and that never needs cleaning. It’s only the smaller Minimax that does.

I just clean burned my large BGE the other day. I love making pizza on the egg, but it was taking on an unpleasant flavor. I’ll be curious to see if my tidied up egg makes a difference.
LikeLiked by 1 person
Hope it does bud. What temp do you normally cook pizza at? I cook mine at 400C/750F on the Large Egg, that never needs a clean burn as at that temp all the fat vapourises.
LikeLike
I do mine a little cooler as we like the crust a little thicker. What I have find works best for us is about 450F at the dome and cook them indirect on a pizza stone raised to just above the gasket.
LikeLiked by 1 person
Thanks for the tips on how to clean the big green egg! I appreciate the warning to not do the clean burn on brand new green eggs since they don’t have fat, grease, and other undesirable detritus yet. I’d be sure to do the clean burn only when the big green egg is already used up. I’m actually looking into getting one later for our family barbeque next week. I’m just researching on how hard it’ll be to clean. Luckily, cleaning it doesn’t appear to be that complicated.
LikeLiked by 1 person
Hi Jeremy – thanks for the comment. Yes, only clean the Egg when needed, and then by doing a controlled clean burn staying below 400C/750F. I normally do this after having done a cook and there’s still some lump left in the Egg. If you cook pizza regularly, you probably won’t need to do this.
LikeLike