
A food blog can live or die on the quality of the photographs. A blogger could invent the most creative, heavenly meal on the planet, but an out of focus, badly lit shot won’t entice readers in. So I’ve used some simple tricks, low-cost lighting and free software to improve picture quality.
Below are my top five tips on on how we get our pictures looking as good as the food tastes.
The pictures below show before and after photographs of buffalo chili with roasted tomatoes, demonstrating what can be achieved in post-processing (section 5 below). However, to get the initial shot in a state that it can be successfully transformed into an appetising picture takes more than computer (or phone) software …

In this post I skip over the minutia of specific camera operations. If I went into detail, the post would be too long. It will be the subject of a future blog post. In the meantime, Wikipedia is a great way to learn. So is being married to someone who already understands cameras, did optical physics at university and is a keen photographer.
1. Plan in Advance … Or Leave Until Later
The most important lesson I’ve learned is to plan the final, plated shots in advance. Why? If you spend 10 minutes getting the depth of field correct, the composition perfect and the lighting right to shoot warm, ready to eat food, you may get a great picture. You will get a lukewarm (at best) meal and a cold reception from your wife and/or dinner guests.
The shot below of Aloo Jeera was set up in advance, including the pepper and potatoes in the background. The bowl had apples in it to test focus, using a camera on a tripod. I took some shots, adjusting camera settings, lighting and composition. And then left everything alone. When the meal was ready, I placed a bowl with Aloo Jeera, took photos, checked them and was done.

Alternatively, use leftovers the next day. The photo below of buffalo chili with roasted tomatoes was taken the morning after I cooked the meal. The meat and rice were cold, both left over from the previous day. I had plenty of time to get a good shot with the right light. Same goes for the shot of butternut squash macaroni and cheese.


2. Composition – Setting The Scene
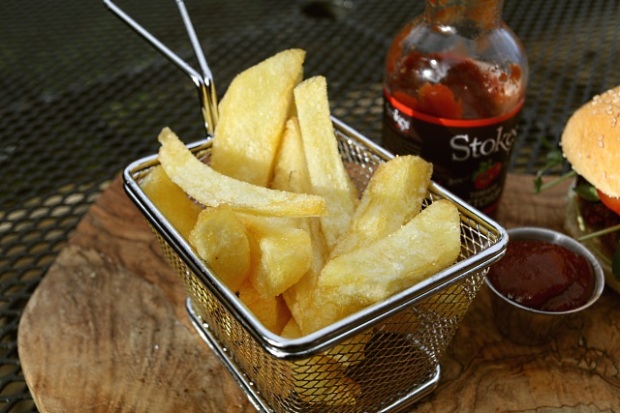
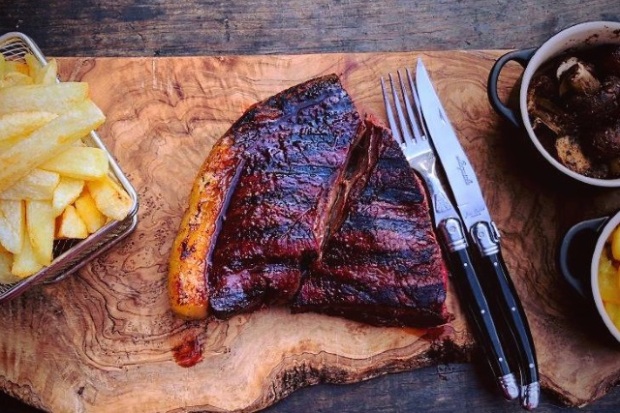
A photo of steak on a dinner plate is not very interesting. Replace the plate with a wooden board, add some cutlery and side dishes and you’ve got a much more inviting rustic pub steak scene. The reverse seared steak below has the meat is the main focus on an olive board, chips/fries and cutlery clearly in view and a suggestion of side dishes to the right.

All of this was planned in advance, the shot was taken and we were eating. As to what goes into composition, it’s a personal choice. If you’re not sure, look at pictures you like, work out what it is you like about them and do that. Then experiment and expand your photographic horizons.
There is a danger of going too far and adding in every utensil and ingredient used to make the dish, detracting from the picture’s main visual component. I normally take pictures with up to four ingredients, one set of cutlery and maybe a cooking implement.
I have a range of containers for presentation, e.g. chip buckets, copper frying pans and ramekin dishes. I don’t normally use these to serve the food, they make the photograph look good. Check out your local charity shops, the olive wood board in the steak photo above came from one.

Action shots can be effective, especially when they’re a bit messy. One of my favourite pictures is carving duck a l’orange. I’m about to serve the meal, the cooked potatoes are in the background, oven gloves are discarded nearby and the jus coming off the duck is visible. The duck is the primary focus. These are trickier to prepare for, sometimes they work, sometimes they don’t. Using a fast shutter speed or sports setting helps.

Take a shot that includes a bit more than you plan to use. It’s easy to cut the important piece out of a photo, but virtually impossible to add it in afterwards. In the two pictures below, the first is the original shot (without any processing). The second is the photo I wanted.

3. Camera Equipment
I’ve seen both amazing and dull pictures taken with really expensive camera equipment. I’ve also observed superb photographs taken with old cellphones and basic compact cameras. Learn what your kit can do, and its limitations.
A good eye for picture composition, advanced planning and test photographs are far more important than high-end camera gear.
My wife is a photography enthusiast. She has a Canon 80D with an EFS f2.8/24mm lens, used for a lot of pictures in this blog. It’s a £1000 setup, and I don’t use anywhere near the full range of features the kit has. The two aspects of the kit that I could not do without are these:
- Touch-screen: I touch the large screen at the back of the camera, the lens focuses on that point and takes the picture. This is especially important when considering …
- Shallow depth of field: this is the f-stop/f-number, I use a range from 2.8 to 5.6. The lower the number, the shallower the depth that will remain in focus, with the fore/background slightly out of focus.
There are some lower priced cameras that do a great job. The picture below is from a compact Canon Powershot G7X mk2 (a friend’s picture, thanks Darian). It’s a great little camera, with f1.8-2.8, perfect for food photography. It has a touch screen and can send pictures to mobile devices directly. If I didn’t have my wife’s Canon kit I’d get one of these.

Modern cellphones can take great pictures, e.g. an iPhone with a portrait mode function. This mode simulates an f/2.8 depth of field using software. The phone also allows me to touch a point on the screen to focus on. Also the iPhone comes with some pretty decent post-processing software in the Photos app. Compare the two photos below, one was taken with a Canon 80D and the other with an iPhone 8 Plus using portrait mode. Can you guess which is which?


The answer is at the bottom of this blog post. But before you scroll down, even if you could tell a difference, is it enough to warrant spending money on a new camera and/or phone if you already have one of them?
The only issue I’ve found with the iPhone 8 Plus is it has a tendency to over compensate the exposure and let too much light in at times. The picture below of duck a l’orange has a very bright roast potato in it.

4. Location, Location, Location … and Lighting
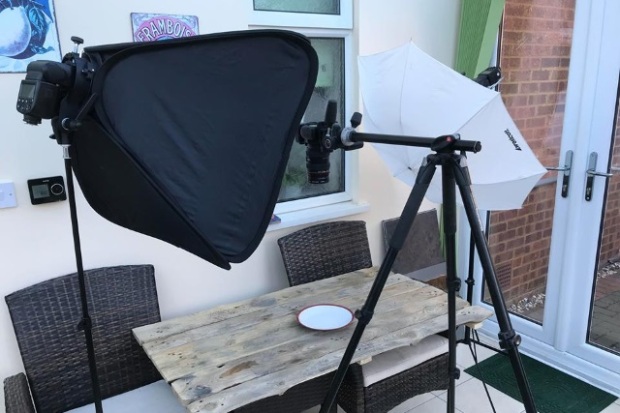
I’d love to have a dedicated room where I can set up overhead, targeted lighting, flash guns, light meters and so forth. If you’ve got space to do this, go for it. The picture below is of a friend’s photography studio (thanks Adie), complete with tripod, flashguns and a bunch of other stuff.
What do I have? A kitchen with a window and a dining room table next to patio doors. And in the summer I have an old, distressed table outside where our Big Green Eggs are. Virtually all of the photos in the blog are taken either in our kitchen or the outside table.
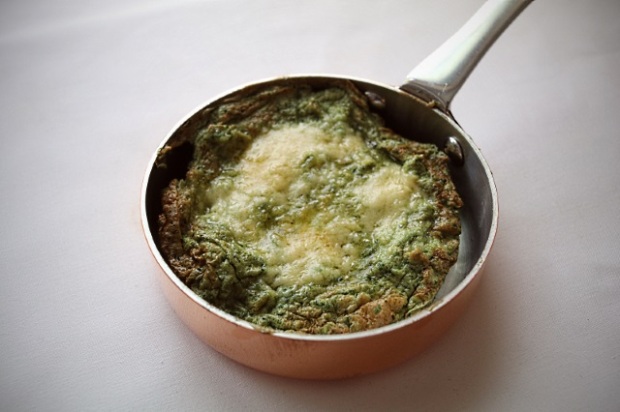
The window light in the kitchen can be problematic. I can take test shots in advance, yet by the time it’s come to take the plated shot the light has changed. So I try to get the test shots done close to serving time. For a surface, I use a raised platform as pictured below. This setup was used to take the picture of wild garlic leaf pesto sauce.


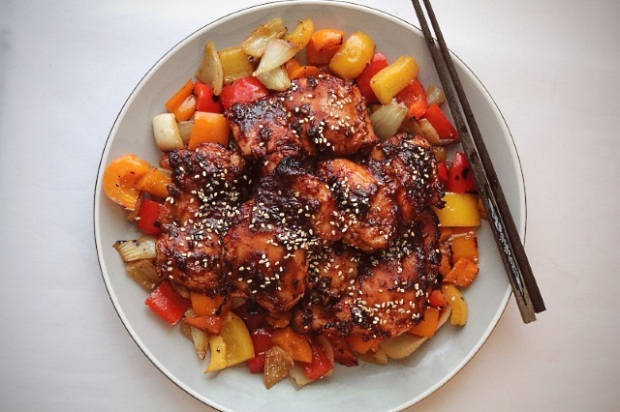
Sometimes I’ll put a white cloth on the chopping board, for variety and/or colour contrast. The photograph below of ancho chili and hoisin chicken was taken on such a cloth, the kitchen window is just off the top of the picture. As the food has mostly warm colours, a white background makes a better contrast than the chopping board. It also looks like it’s served on a tablecloth.
When it’s dark outside, there’s little to no light so photography in the kitchen is no good. There overhead spot lights (I don’t cook in the dark), but these generate a light yellow hue when food is photographed. Not good. What I use in this situation is two daylight simulating bulb attached by a clip to a tripod.
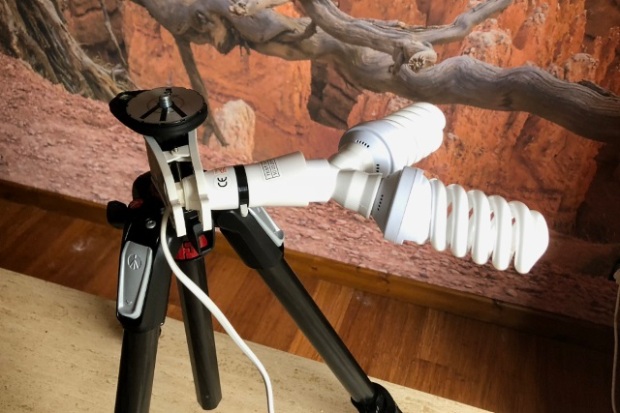
This setup is composed of the following items:
- 2 x 30W daylight bulbs
- 1 x clip on bulb holder
- 1 x bayonet to screw converter (only because I couldn’t find a clip with a screw bulb fitting)
- 1 x screw bulb splitter
It’s not as good as daylight in the kitchen, but it does get some decent shots, e.g. this picture of smoked ham and mushroom carbonara. The other advantage of it is that the light won’t change when the sun goes down.

5. Post-Processing
The most common post processing software is probably Lightroom. It costs money and takes a bit of getting used to, but once learned, it is incredibly powerful. My wife uses Lightroom for her wildlife and landscape photography.
I use the Paint.net application. Virtually all pictures in this blog have been post-processed with it. Paint.net is nowhere near as comprehensive as Lightroom, some of the stunning Yellowstone pictures my wife has got out of Lightroom simply couldn’t be done in Paint.net. However, Paint.net is free and it does what I need for food photography.
There are a myriad of online training videos for Paint.Net. As a starting point, try the steps in this YouTube clip of me post-processing a huckleberry glazed chicken wing picture. Then try some other tools, e.g. curves.
And the answer to which was which for the iPhone and Canon camera pictures? The steak picture was taken with an iPhone, the ribs with a Canon camera. Also the buffalo chili in section 1 and steak pictures in section 2 and 4 were taken with an iPhone.

Very generous of you to share this advice – it is a real problem to get decent photos ‘on the hoof’ when family and friends are just wanting to eat – but even then following some of these ideas will help and improve – thanks Adam!
LikeLiked by 1 person
It’s a pleasure, Mark! And good luck with the bread!
LikeLike